Showing posts with label player. Show all posts
Showing posts with label player. Show all posts
Tuesday, 3 July 2018
failure
I tried to create a perfect balance - an account that did not get killed, but reached leaderboards entry (100 missions).
Got bounced by a Spitfire in dense clouds, and insta-killed. That was the 39th mission. More than 100 player kills up to that fail.
Next time I try (if ever) I'll stay high if the clouds are terribly dense.
Monday, 23 May 2016
MaxKayDee (player)
The MaxKayDee ("maximum kill/death" ratio) special project is complete !
101 random arcade air battles*
433 aircraft kills
9 planes lost
48.1 kill/death ratio
61.9 kill/death ratio excluding deaths from collisions
61.9 kill/death ratio excluding deaths from collisions
4.3 kills per match on average
116.3 minutes average time of survival
2.4 minutes average time between kills
2.4 minutes average time between kills
91 % of matches survived
55.5 % of matches won
My intent was to see what kill/death ratio I can achieve if I focus on it with a new account, including stock planes and rookie crew.
 |
| He 112 B-1/U2 |
 |
| Fw 190 A-4 |
I created an account, spent a buck on some gold, purchased the German He 112 B-1/U2 premium fighter since it looked like the best possible German plane to start with (though American Thach's F2A-1 would have been an even better start). The He 112 was meant to research towards the Fw 190, preferably directly to Fw 190 A-4 - and it did. This part actually exceeded my expectations, without a single He 112B-1U2 lost, resulting in a kinda infinite k/d ratio. I learned that I needed to add a 2nd and 3rd plane in order to reduce the BR by one step (2.3 to 2.0), though this should not have been necessary according to widely circulated BR calculation rules. Staying alive in the He 112 was stressful, for it is a turnfighter that faces several faster opponents and the pilot would hardly survive even only a single hit.
Then I switched to Fw 190 A-4 and flew it with great caution (and some kill luck) initially, quickly researching the most vital upgrades. It was in full swing once it got its engine injection upgrade, and with all-stealth ammo the deadliness improved another time at least against fighters.
The A-4 is rated BR 4.3, but most matches I flew as 4.0. I turned out that a 2nd and 3rd plane with BR no more than 1.0 lower were needed to reduce the BR to 4.0, something that was apparently introduced recently. About 10-20 matches were thus flown at 4.3. The Fw 190 A-4 is tier (era) II, so I didn't meet any tier IV opponents. The biggest bombers I faced were B-17E and Pe-8, the best fighters I faced were J2M2, Spitfire IX, Fw 190 A-4, Bf 109 F-4, Yak-9T, Yak-3, Typhoon 1b, Mustang Mk I and P-51.
I knew the A-4 well and like it very much, but staying alive for 79 matches was beyond my ability and luck.
I remember all nine Fw 190A-4 planes I lost as MaxKayDee:
Once
an I-185 was diving at me from high altitude and I decided to evade by
diving towards the airfield. An I-16 was in the way, but couldn't be hit
(I was past 600 kph already, so controls were stiff and the I-16 was dodging). Regrettably, the I-185 was resolute enough to
follow me and the airfield defences chose the I-16 as target instead,
so I lost a wing when turning in an effort to stay within airfield
defences' range. It was a classic "shit happens".
Second,
I was stubborn enough to get shot down by a A-20G turret gunner. My
bad, approaching from that angle AND staying behind the bomber for so
long was stupid.
Almost
third; a Pe-8 zombie gunner set me on fire early in an air domination
match, I extinguished the (rear fuel tank) fire, climbed with a leaking
(forward) fuel tank and then kept sailing till the end of the match. I
was at 300 m when the match was over at last.
Third,
a Spitfire IIb insta-killed me (likely 20 mm to the pilot) a split
second after I scored a P-51 while I was diving with 750+ kph. That was
likely a super-lucky shot.
Fourth, I knew a blue P-47 was 1,000 m above me and turned left upwards to kill a P-51 when suddenly that P-47 crashed into me. Blue-on-blue air collision death.
Fifth, a Pe-8 shot me the wing off on first hit, but it was my bad since a botched approach led me into a five o'clock high position where 3 gunners could shoot at me. I never respected the Pe-8 much as A2A even though others on teamspeak expressed great respect for its gunners. Well, there's always a first time.
Sixth, I botched another approach and got into the field of fire of a Ki-49 tail gunner (20 mm) for a split second, and he had his lucky day.
Seventh, I was chased to the blue airfield by a Typhoon and another plane. The airfield defences killed the other plane, and I shook off the Typhoon (which has a poor roll rate and seemed to reload) with scissors - only to crash into a mountain next to the runway soon thereafter. The looking left and right during scissors combined with the loss of speed left me unable to dodge that mountain.
Eighth, A J2M2 chased me (and was to my surprise faster), caught up and after a lengthy dogfight it defeated me in a honest 1-on-1 (which it started ~2 km behind me at equal energy, though). As usual, I wasn't all that great in scissors, the only manoeuvre a Fw 190 A-4 is better at than a BR 1.0 lower J2M2. I had merely one split second chance to hit it and missed.
Ninth, I was engaging a fighter during a shallow dive at 750+ kph when suddenly a blue He 112 appeared out of nowhere in front of me and crashed into me. I couldn't have dodged it even if I had seen it somewhat earlier, since the controls are too stiff at that speed.
I lost no plane during the last 15-20 matches.
Tactics and principles with Fw 190A-4:
Turn 90°, climb at 25° to 4 km, then turn towards reds while climbing at 20° to 5 km and possibly at 15° beyond. Preferred targets were bombers and attackers (other than B-25, PBJ and later also A-20G and Pe-8) from their weak (no or minimal resistance from gunners) angles. I actually killed a lot of B-25s, but always with extra caution.
Fighters were killed preferably with Boom-and-zoom, sometimes with Rope-a-dope. Head-on kills against fighters were very rare, but sometimes I was forced into such an encounter. I sought head-on fights only against opponents with at most two light machineguns facing me. I largely avoided getting shot at by more than two light machineguns or one heavy machinegun in any situation. My planes usually finished the battles with no damage displayed.
Repairs on runways were only done if absolutely necessary. I had to repair only two or three times and finished one match as a glider without fuel. I never captured a runway.
In de facto lost matches (such as 3 blue planes left facing 8-12 red planes) I either withdrew or -if possible- kept fighting with energy advantage (above the reds).
On domination maps with multiple airfields I tried to stay close to the "blue" airfield, especially if it was the farthest from the red spawn point. Red fighters would typically be distracted and low there.
My aim usually was good enough for a kill on first pass, I estimate about 80% of targets were killed in one pass and a ratio of 9:1 in terms of kills and assists. Both fighter types have above average firepower at their BR.
My gun convergence range was 500 m in both planes.
When in trouble:
(a) run away if fast enough
(b) defensive spiral
(c) scissors (especially against P-38, Spitfire and Typhoon since they roll slower)
(d) run to blue fighters for help
(e) run to blue fighter spawn point for help
(f) run to blue airfield for (AAA) help
(g) head-on fight with opening fire at 1.3-1.5 km and evasive manoeuvre beginning at 0.8-0.9 km
(h) if pursued by a turnfighter: dive and run
I estimate I fed the airfield defences about 10-15 red fighters, none of which were counted as my kills, of course.
Screenshots:


 |
| Crew level stayed below 30, so no acing was possible. |
 |
| The long reload time of about 26 seconds was a pain in the butt, and it was even worse early on in the He 112. |
 |
| The final match. All I wanted was to not lose a 10th plane, but it turned out to become the match with the most kills! |
 |
| On the 99th match once again a squad got obsessed with chasing me in vain. I only scored a single kill that match, but I neutralised 3 red players for long. |
*: 101 matches is as far as I know the minimum for a leaderboards entry. I will add the leaderboard screenshot once the leaderboard is updated
The leaderboard stats are out, and MaxKayDee unintentionally achieved a top 100 place for air kills per session (all time):
__________________
The leaderboard stats are out, and MaxKayDee unintentionally achieved a top 100 place for air kills per session (all time):
 |
| kills per session is almost the same as kills per match in the case of MaxKayDee |
Sadly, there's no k/d leaderboard category. I'd like to see who (with 100 or more missions) achieved a higher k/d ratio, and with which planes. I guess it could be done with the Ki-45ko, but how to get to it without losing a couple Ki-10?
Wednesday, 22 July 2015
LastDingo: Winning matches in eras I-IV
Unlike the previously presented players, LastDingo isn't a specialized low level player exploiting the special conditions of era I only. LastDingo played eras I-IV, stopping short of the long grind for jets. A few hundred tank battles were included, but the obvious display of stupidity and cowardice in tank battles was a turn-off.
His obsession was the maximization of the victories/battles ratio, yielding a top 100 rating in this category after months of playing. LastDingo flew about half of the matches in squads, including hundreds with INIT2WINIT and hundreds with TFD players. The most extreme results were during the winter 2014/2015 with "last month" victories/battle at about 95%. His record was a 118 match victory streak with American BR 3.0 and 3.3 planes in late 2014.
LastDingo won 2,944 matches out of 3,675 (80.1%).
 |
| B-25J, a fantastic and versatile bomber |
Aircraft types favoured by LastDingo:
A-20G: A fantastic light bomber
B-25J-1/-20: Very good bombers all-round, albeit with unpleasantly small bombload
B7A2: Fantastic escort fighter, also killing pillboxes from high altitude. Best B7A2 tactic is to dive on climbing red fighters.
Beaufighter VIc: Most satisfying firepower.
Bf 109G-10: A bomber destroyer with 3 30 mm guns. Capable of stopping heavy bomber rushes almost on his own. Capable of chasing G8Ns at high altitude - two G8N kills above 8 km altitude were scored. The downside of the 109 is that apparently everyone attacks it, expecting an easy kill.
Boston/Havoc: Weaker than even an A-20G, but together with DB-7 and
maybe the TBF the only really worthwhile British propeller bombers.
Do 217E-2/-4: First really powerful bombers, a squad of which can
turn the base & airfield bombing tactic into a winning tactic.
F6F-3: Very good fighter-bomber, with good turnfighter qualities.
Fw190A-8: Most satisfying firepower.
Fw190D-9: No love for it until a domination match with 19 kills in it - bloodlust!
Il-4: A fantastic Russian bomber for high altitudes. Can kill
pillboxes and bases from above 7 km with near-immunity, then dive and
kill tanks with its three heavy bombs.
Ki-43-II: Ridiculously good low level fighter. Can kill many armoured cars with ease.
P-38G-1: First really good bomber destroyer in the American line, albeit with a tendency to die in flames.
P-47D-25/-28: Most powerful fighter-bombers, capable of destroying eight destroyers with a single load of bombs and rockets. Even the new AD-1 Skyraider isn't really better.
Pe-2 (early ones): Effective Russian light bombers, good tank/pillbox/destroyer killers.
Yak-9K: Almost the same as Yak-9T, but with 45 mm gun.
Yak-9T: Very good Soviet fighter with much-feared 37 mm. AP
ammunition enables this gun to kill medium tanks. The hate against all
Yak-9 (because of their one-shot-kill guns) is so strong that they appear to receive extra attention by red
fighters.
The best mix was a BR 3.0 setup with P-38, B-25, A-20G, both P-47 and the F6F. It was powerful in ground strike due to 2 good bombers and 3 best fighter-bombers and powerful in air combat with 4 good fighters and 2 tough bombers with many fixed machineguns. This mix yielded approx. 80% victory rate flying solo.
A summary of LastDingo's principles:
determination to win (many THINK they want to win, but actually they do what they feel like at the moment instead of what's needed for a win!)
avoid undue attention (climb high and to the sides, avoid field of view, keep distance, avoid initial or respawn fighter waves)
never trust the blue randoms
choose good plane lineup, including BR considerations (2 bombers or
1 bomber + 1-2 fighter bombers, preferably 1 bomber interceptor like
Bf109G-10/F4U-1c/ 4 cannon Brits/Yak-9, all else: fighters for
domination map air duels)
focus on objectives and keeping the others from accomplishing them (kill bombers, defeat airfield capture efforts)
choose ONE path to victory (in ground strike: airfield kill OR bases/tanks/pillboxes kill)
readiness to adapt to the situation (let off from airfield to kill tanks if need be)
keep an eye on ticket counts
prioritisation of important aircraft (bombers with more bomb load, ignoring fighters)
do not engage an aircraft that's already being chased unless it really needs to die ASAP
partially fly in squads with TS3
stay at key airfield and low during domination battles if ground forces are irrelevant on the map or at the moment
some skill at aiming guns
some skill at aiming bombs (one 500 lbs/250 kg per moving tank, 3-4 tank kills in one pass)
speed capture of airfields (instructor off)
surprise/dive capture of airfields (pretending to not land, then suddenly land)
knowing the own aircraft
knowing the hostile aircraft
knowing the maps
knowing typical random player behaviour
look at 'n' list to identify new red bombers and unusually successful red players
chat communication to motivate at least a few players to do the right thing
stealth ammunition for fixed guns except in tier I
basic evasive manoeuvres
basic offensive manoeuvres
look at 'm' map to plan ground forces destruction
assignment of vectors for bomber destroyers (left high or right
high), threats (individual bombers) and ground targets (left or right)
in teamspeak
engaging 'suitable' targets (big gun fighters prefer large target planes, agile bombers bomb troops flying low)
some high altitude bombing with first
climbing to altitude during sideways climb instead of impatiently flying
straight towards the reds
playing at eras I-IV to have fun in the full diversity
stop playing for hours after a defeat streak of four
share tactics, tricks and target info with squad mates
drop bomber's bombs for quicker climbing
announce incoming bombers to team to improve bomber interception
LastDingo was the founder of a quasi-secret quasi-invite-only chat channel into which the top 100 players of the leaderboard in victories/battles were invited. About 50 players joined it, and the channel was successful in getting top players to know each other. It's largely defunct now because it disappeared due to a bug (or feature?) of the seemingly still buggy WT chat system.
Statistics of LastDingo:

 |
| sorted by sorties |
 |
| sorted by air kills |
 |
| sorted by ground kills |
 |
| tank battles, sorted by sorties |
Thursday, 16 July 2015
"Air_Force_of_One": Winning matches in low tier planes
"Air_Force_of_One" attempted to maximize the victories/battles ratio and reach the top, being No.1 in the Leaderboard for that category. The attempt was successful, albeit he dropped to No.5 later on. Exclusively Soviet planes were flown, mostly to exploit the power of the BB-1/Su-2 family of attackers on low level "Ground Strike - light vehicles" maps.
Schwanzus Longus flew three missions in a squad of two (one of these three was lost), all others solo. No crews were aced. No gold was purchased. He flew at about patch 1.48, at BR 1.0-2.3.
"Air Force of One" is mocking the old U.S.Army's slogan "Army of One".
"Air_Force_of_One" won 196 of 207 battles (94.7%).
The conclusion was that this is very close to what an individual can achieve flying solo. Red teams with three good players with 15+ ground kills each could not be overcome without a 2nd good player in the blue team.
 |
| A BB-1 attacker in action |
The BB-1/Su-2 family combines a good light machinegun armament with quick-reloading light bombs. Six 100 kg bombs was the preferred load because the twelve 50 kg bombs load degrades the flying characteristics of the plane too much. The Su-2 TSS-1 is actually the weakest of the bunch since is has a mere two forward-firing fixed light machineguns and thus takes longer and spends more % of its rounds for an armoured car kill.
The MiG 3-15 was a fantastic high speed fighter at BR 1.7, the 20 mm cannon-armed LaGG 3-11 and Yak-1 were powerful on a domination map. The LaGG series has some irritating handling issue when yanked around with mouse aim, though.
The (gifted) premium plane "Zhukovsky's I-153-M62" is a fantastic dogfighter at low altitude on a domination map. The I-16 type 5 was a disappointment - it seemed to excel at nothing but rolling.
The tactics weren't much different from those described by Schwanzus Longus, but the techniques differed. The better guns allowed for much more effective air combat kills particularly on the Krymsk map, with less effort on guarding the runway. The six 100 kg bombs of a Su-2 or BB-1 allowed for more ground troops kills per minute, and their defensive gunner alerted of trailing red fighters. Dodging the bullets of pursuing red fighters became the standard survival technique, while tight 360° turns or high speed were no promising option for these attackers. The MiG-3-15 and to a lesser degree the LaGG 3-11 and Yak-1 were able to outrun many reds, but the latter ones were used in air combat (on Krymsk) exclusively.
The bomb-throwing technique was simple; mark target to see the range, zoom in, aim at about 20-50 m ahead of the target vehicle in its path. Some light vehicles attempt to dodge attacks, but this hardly ever works against 100 kg bombs. Bombs were almost never expended on artillery or AAA of any kind: Only the slightly tougher armoured cars were bombed. Sometimes one bomb was left and would be dropped at the end of a pass in order to reload six new bombs earlier. The 100 kg bombs were always set for instant detonation on impact.
Overall Air_Force_of_One was a very special pilot who tested the limits of what's possible for a solo player. A new War Thunder player might come to the conclusion that about 25% of the blue teams are too stupid to be saved by a single player, Air_Force_of_One showed that the limiting problem is rather that about 3-5% of the red teams are too stacked with the usually very few good players (three of them, whereas average is less than one) to be defeated by a solo player supported by an average (inept) team only.
Statistics of Air_Force_of_One:


Friday, 10 July 2015
"Schwanzus Longus": Winning matches in low level planes
"Schwanzus Longus" is a fun account created for but one purpose: To fly Italian fighters and win. Nothing else was flown in it, not even a He 51. The premium CR.42 was purchased prior to first match to avoid the non-Italian He 51.
"Schwanzus Longus" is the German translation for "Biggus Dickus". It felt like the most appropriate quasi-Italian name since many others were taken already.
Schwanzus Longus flew all missions solo, none in a squad. No crews were aced. He flew at about patch 1.48.
Schwanzus Longus flew all missions solo, none in a squad. No crews were aced. He flew at about patch 1.48.
128 of 144 of battles were won by Schwanzus Longus (88.9%).
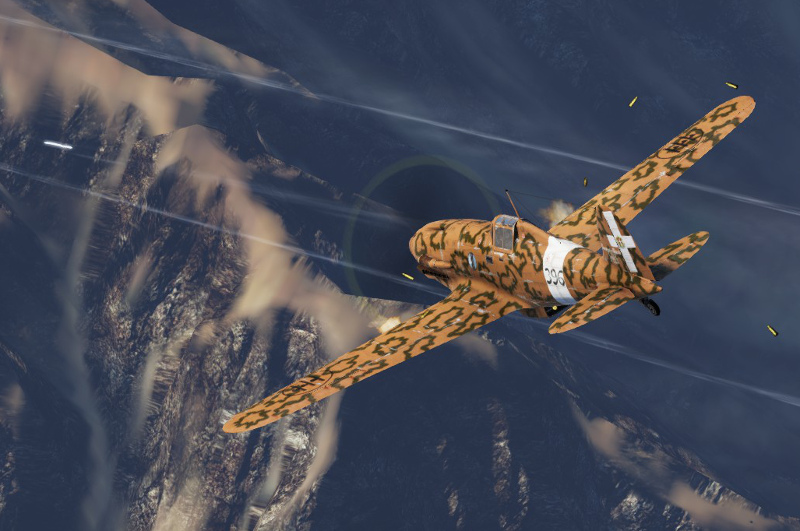 |
| the fast Macchi M.C.202 |
Most Italian fighters have no fearsome reputation, but at the same time they're all good enough for great results if flown well. Schwanzus Longus used:
M.C.202 (fastest, two 12 mm + two 7 mm guns, some pilot armour, no turnfighter at all)
M.C. 200 series 7 (two 12 mm guns, combat flaps)
M.C. 200 serie 3 (two 12 mm guns, combat flaps)
G.50 Freccia series 7AS (two 12 mm guns, two 50 kg bombs)
G.50 Freccia series 2 (two 12 mm guns)
Marcolin's CR.42CN (two 12 mm guns, fixed landing gear, agile, premium plane bonus)
CR.42 Falco (two 12 mm guns, fixed landing gear, agile)
The
most powerful Italian fighter is no doubt the M.C.202,
which by virtue of its high speed is very difficult to kill and at the
same time possesses the best armament of all Italian fighters in WT today (1.51.x). The only worthy BR 1.7 opponents to a M.C.202 were the similar MiG 3-15 and the much more agile Ki-43-II. The Ki-43-II is a superior dogfighter regardless of relative starting positions if the M.C.202 has no large initial energy or surprise advantage. Nowadays (patch 1.51.x) the recently upgunned F2A-1's may be superior to the M.C.202 in battle even though they are BR 1.3 planes.
Era ("tier") I and II battles of Schwanzus Longus with BR 1.3-1.7 AB/air ranged from BR 1.0 to 2.7 and were "Ground Strike - light vehicles" maps or the "Krymsk" domination map. The toughest Ground Strike map at this level as of patch 1.51.x is "Alpine Meadows", particularly so with many low clouds.
The path to victory in Ground Strike - light vehicles is simple:
(1) Kill ground troops (armored cars, artillery, anti-air artillery)
(2) Interfere with those who do (1) the best on the red team.
The choice of ammunition is "ground targets" for the 12 mm (actually 12.7 mm) and "stealth" for the 7 mm (actually 7.7 mm) guns. The idea is to use the tracers for improved accuracy against ground targets without being misled by the weaker 7 mm gun's tracers.
Light vehicles are easier prey for machineguns with tracers than without. You should aim a bit low when strafing. Few 12 mm AP hits suffice to kill an armored car, while most inexperienced pilots have trouble killing armored cars with 7 mm guns..
The attack on ground vehicles is little more than about surviving red fighters, air/ground marksmanship and determination. The determination to kill as many ground troops as possible is the most important ingredient. Most players will claim to play to win, but few actually do so. It is possible to bomb airfields on ground strike maps, and any player who does so earlier than at battle rating 4.3 (when the blue team may have multiple Do 217Es) is playing for the defeat of his team by wasting his player slot. Low tier battles are almost never won by airfield destruction. The airfield bombers' diversionary effect on red fighters is their only really relevant benefit to their team. All types of bombers could destroy a disproportionate quantity of red tickets by attacking ground troops instead.
The M.C.202 should be flown differently from all other Italian fighters as it's best if always kept at high speed. It can be used to race from one side of the map to the other, taking shots at ground troops al the time before reloading and turning back for another pass. Often times two or three red fighters would pursue it and thus be neutralized. Its speed is also fine for killing the red rear ground troops, particularly on the "Alpine Meadows" map. Many players who attempt to reach and kill those fail in slower planes, and a good plane such as M.C.202 can and often should deal with the high-hanging fruits. Its lethality of "Ground Strike - light vehicles" maps is such that hardly any red plane is dangerous enough to justify a fine M.C.202's attention there. Only BB-1 and Su-2 pilots are at times more dangerous and were killed by Schwanzus Longus on light vehicles maps without offering themselves by crossing his sights, but their players usually have several more near-identical planes in their setup.
The old style "Spain - light vehicles" map included a couple pillboxes and light tanks that but one Italian fighter could take on: The "Fiat G.50 series 7 AS" with its two wing-mounted 50 kg bombs. The best attack procedure was to dive on the target knowing which bomb would release next and score a direct hit. A near miss was ineffective (unlike with light vehicles). The limitation to two 50 kg bombs per such plane made it extraordinarily difficult to win on these maps if the blue team was not helping against the hard targets, and about half of Schwanzus Longus' few recorded defeats happened on this old version of the Spain-light vehicles map. A much better victories/battles balance would be possible under current (patch 1.51x) conditions.
Winning on the Krymsk map is different, and actually the opposite:
The ground troops rarely if ever reach the airfield before the end of the match and are thus largely unimportant. Their ticket value (100 tickets per vehicle) is low compared to overall ticket count, and their anti-air firepower is an unimportant contribution to the match as well. Only one thing matters a lot: Airfield possession.
This is why the CR.42 is actually a good plane on the Krymsk map. It has effective heavy machineguns, the agility to fight within one kilometre of the airfield at low altitude guarding it against touchdown attempts and it has a fixed landing gear. The fixed landing gear makes unintentional contact with the ground much less troublesome and it allows for near-instant touchdown on the airfield. The airfield can be captured longitudinally only for want of clear paths crosswise. It is possible to neutralize or capture this airfield while rolling parallel to the runway instead of on the runway. This attracts a little bit less attention.
The CR.42s are not fantastic biplanes in WT (the CR.42 was likely the best multi-wing fighter historically), but it's clearly very capable if flown well. Schwanzus Longus' kill balance in both CR.42s was tainted by ground attack and dozens of airfield touchdowns. A 100% air combat focus would have yielded much better kill balances.
The best choice for first aircraft on this map was nevertheless the M.C.202, and probably so among all aircraft in WT. The M.C.202 has an incredible dive speed in AB - it easily accelerated past 700 kph on the Krymsk map starting at the fighter spawn point. It spawns high enough over ground on other maps to reach 820 kph or more in a dive, only a few seconds after the match began.
A roughly 45° dive followed by contour flight to the airfield, lowered landing gear, quick braking with landing flaps and flying S-lines horizontally followed by a quick touchdown for capturing the airfield is a great first move in the match. The chance of capturing the airfield AND surviving without crippling damage was about 1/3. Many red teams lose interest in capturing the airfield and thus in winning if the airfield is defended well afterwards.
The player needs to disable the instructor to capture an airfield at high speed. Go in the hangar to "Menu" - "Controls" - "Instructor" and set all three to "no". The instructor would intervene at high speed close to the ground, and the competition between the player's efforts to touchdown and the instructor's efforts to pull away from the ground leads to crashes.
On Krymsk it makes sense to use stealth ammunition for the 12 mm because it is about air combat, though it's not much better than other choices (except "default") in the M.C.202. The slower planes may stay on the 6 of red fighters for a while and keep hitting them. Tracers are treacherous in such a situation. A M.C.202 should rather boom and zoom, so the attack will be over before the red player could possibly react to tracers.
A look at the match statistics reveals which red players were the most successful ones. One may then prefer them as prey, particularly if one is flying the M.C.202 and has by virtue of its speed the ability to pick fights. The most dangerous red pilots are usually those who attempt to capture the airfield, though. The great plane killers and Yak-1s are even more important if airfield possession changes a lot and the match might be decided by decimating the other team to the point where it cannot compete at the airfield any more.
One more note: The M.C.202 had a higher era (II) than the other Italian fighters when Schwanzus Longus was still active. This was almost perfectly irrelevant - it only meant it might face era III planes, but very few of those were encountered in battle by Schwanzus Longus since very few of them were at BR 2.7 or 3.0. The M.C.202 never entered the beginner map "Foggy Albion", though.
Overall Schwanzus Longus was a very special War Thunder pilot with a most likely unique restriction on the choice of aircraft. We can point at Schwanzus Longus whenever anyone comments badly on the usefulness of Italian fighters in War Thunder. He will rise again when mid-war Italian fighters (G.55, M.C.205, G.56) will be available.
Statistics of Schwanzus Longus:


Subscribe to:
Posts (Atom)